Why Image Compression Matters
In today's web, images account for roughly 50% of total page weight. A single unoptimized hero image can be 5–10 MB, causing your page to load in 8+ seconds on mobile connections. Google's Core Web Vitals penalize slow pages, pushing them down in search rankings.
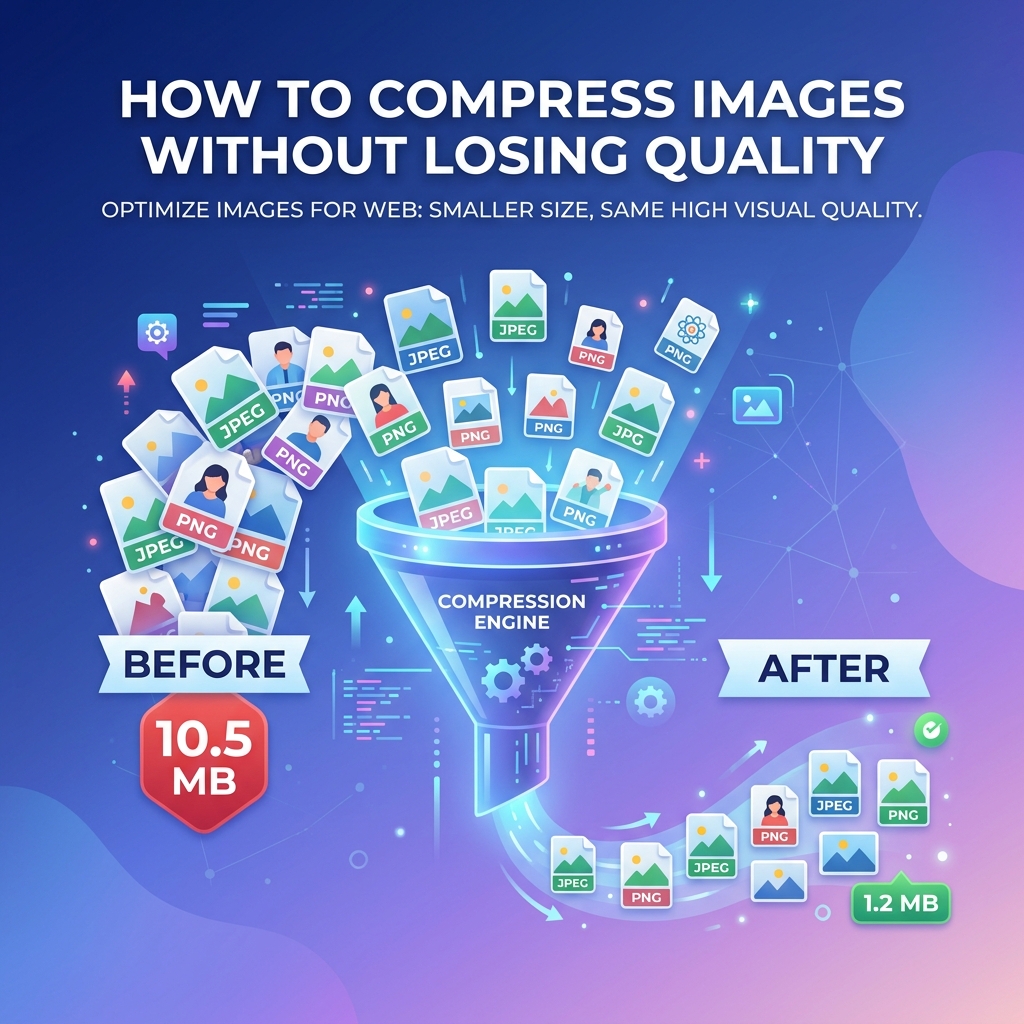
Smart compression can reduce file sizes by 60–90% while keeping images visually indistinguishable from the originals. That translates to faster load times, lower bandwidth costs, and happier users.
Lossy vs Lossless: Understanding the Difference
Lossless Compression
Lossless compression reduces file size without removing any image data. Think of it like zipping a file — every pixel is preserved perfectly when decompressed.
- Best for: Screenshots, text overlays, logos, icons, medical imaging
- Typical savings: 10–30%
- Formats: PNG (with optimization), WebP lossless, TIFF LZW
Lossy Compression
Lossy compression achieves dramatically smaller files by discarding data the human eye is unlikely to notice. It exploits how our vision is more sensitive to brightness changes than color shifts.
- Best for: Photographs, hero images, product photos, social media
- Typical savings: 60–90%
- Formats: JPEG, WebP lossy, AVIF
The Quality Sweet Spot
Most images hit a sweet spot between quality 75–85 (on a 0–100 scale):
| Quality Level | File Size Reduction | Visual Impact |
|---|---|---|
| 95–100 | 5–15% | Imperceptible |
| 80–90 | 40–60% | Barely noticeable |
| 75–85 | 60–75% | Optimal balance |
| 50–70 | 75–85% | Minor artifacts visible |
| Below 50 | 85–95% | Noticeable quality loss |
For most web use cases, quality 80 delivers an excellent visual result at a fraction of the original file size.
Practical Tips for Better Compression
1. Resize Before Compressing
Don't compress a 4000×3000px image if it'll be displayed at 800×600px. Resize first, then compress. This alone can cut file sizes by 80%.
2. Choose the Right Format
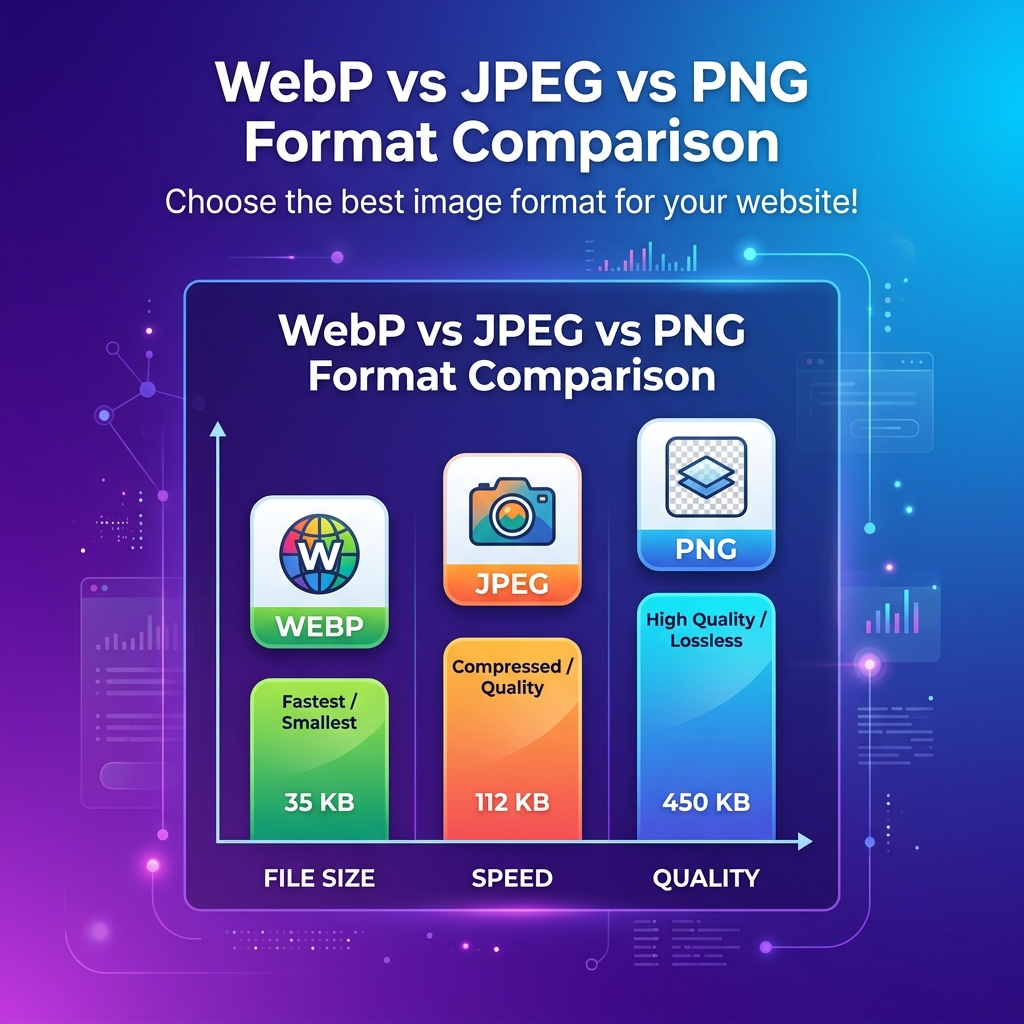
- JPEG → photographs and complex images with gradients
- PNG → images requiring transparency or sharp edges (logos, screenshots)
- WebP → modern replacement for both JPEG and PNG with 25–35% better compression
- AVIF → next-gen format with even better compression (limited browser support)
3. Use Progressive Loading
Progressive JPEGs render a low-quality preview immediately, then sharpen as the file loads. This dramatically improves perceived performance.
4. Strip Metadata
EXIF data (camera info, GPS, timestamps) can add 10–50 KB per image. Stripping it reduces size with zero visual impact.
5. Batch Process for Consistency
When optimizing an entire site, batch processing ensures consistent quality and settings across all images.
How MinifyPic Handles Compression
MinifyPic uses WebAssembly-powered compression engines running entirely in your browser:
- Smart Analysis — Automatically detects image characteristics and selects optimal settings
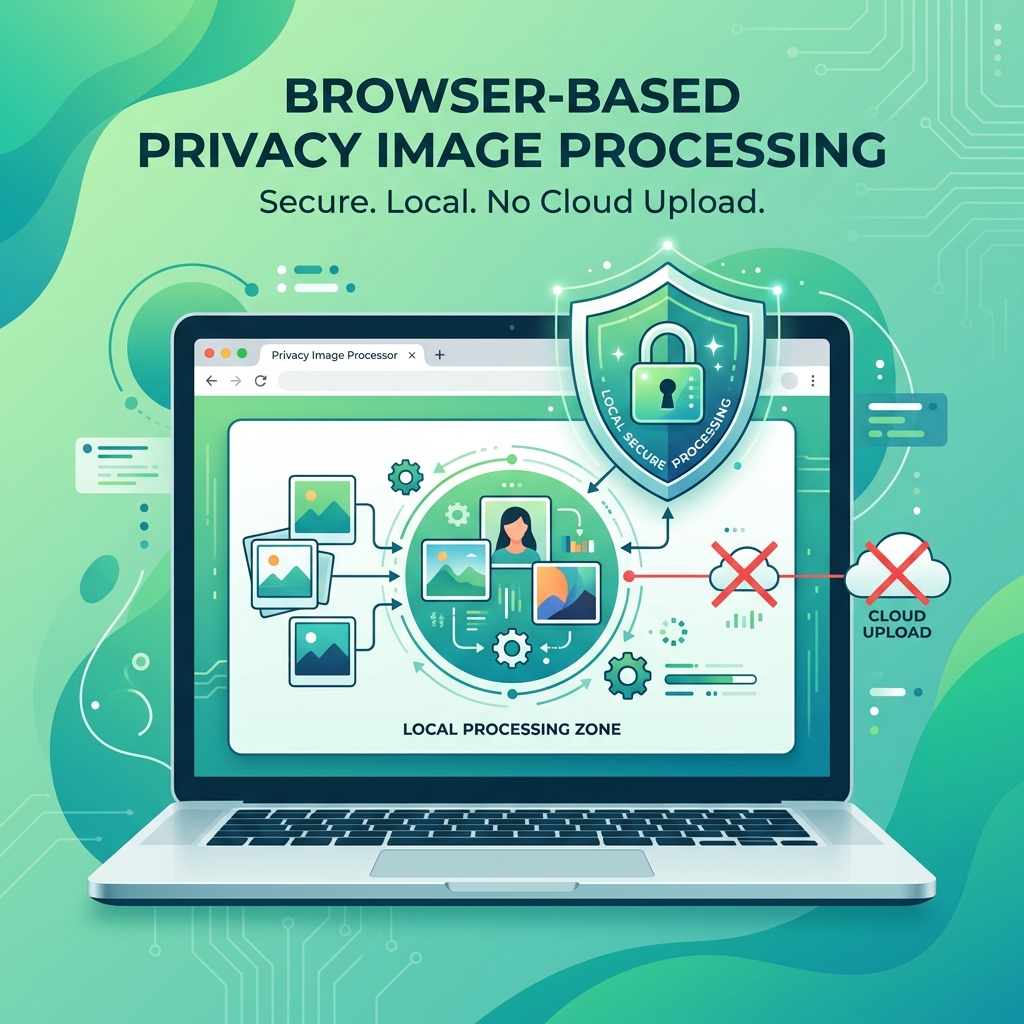
- Browser-Based — Your images are never uploaded; compression happens locally on your device
- Batch Support — Process up to 20 images simultaneously
- Format Conversion — Convert between formats while compressing for maximum savings
- Quality Slider — Fine-tune compression with real-time preview and file size comparison
The result? Professional-grade compression with complete privacy, zero cost, and no quality compromises.